Feels Like Home
The Feels Like Home Stamp Set is a free stamp set from Stampin’ Up! during the August 3-September 30, 2021 Sale-a-bration! For every order of $50 or more, you can select a free product… there are some really great items available so don’t miss out on this!! And, it really does feel like home.
Home is my safe haven and I love the imagery of the inviting front door that this set has. This is a place where family and friends gather and that creates all sorts of feelings of love and joy for me.
Let me first say that I never knew that I had any artistic side until I found Stampin’ Up! I know that sounds like a sales pitch, but it really is so true! It’s been the most wonderfully creative, stress-busting outlet for me!! There’s just something about sitting down with a blank canvas of paper and ink pads and creating something so beautiful with such basic products and then being able to share those creations with the ones I love. It just fills my heart! ❤
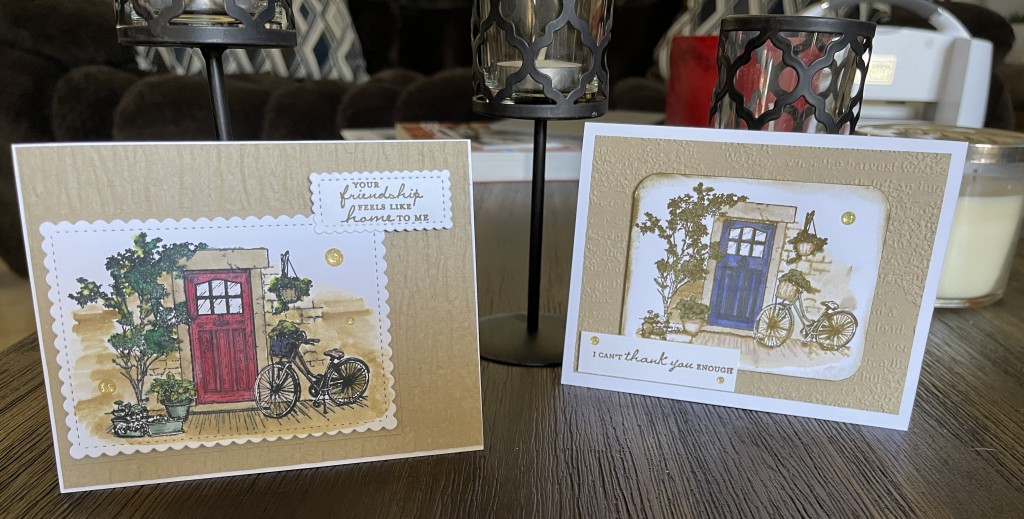
For this project, I made two slightly different cards to show the versatility of this project. I stamped the image from Feels Like Home on Basic White CS with Memento Tuxedo Black ink. Note: While I used regular cardstock for this project and it turned out beautifully, I do recommend using the Fluid 100 Watercolor Paper (149612) to eliminate any running/feathering of your ink. Next, I used the fine point Water Painter to add color to the front door using Cherry Cobbler on one card and Misty Moonlight on the other (you can use 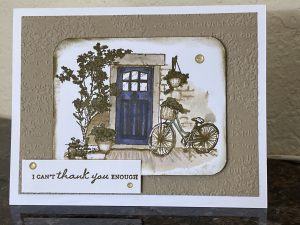 whatever color you’d like). I also added some color to the leaves of the plants using Granny Apple Green and Shaded Spruce and then finished off the painting with a sweep of Crumb Cake or Soft Suede on the walls and ground. If you’ve never used Water Painters before, all you have to do is before you open your ink
  pad, just give it a couple of good, hard squeezes top to bottom. When you open your ink pad, you will now have a little blob of ink on the top cover of your case and you can dip your water painter right in that little color puddle to pick up your ink. How genius is that? (I do not recommend dipping your Water Painter directly into your ink pad.)
Next, I ran a 5-1/8” x 3-7/8” piece of Crumb Cake CS through the Cut and Emboss Machine with the Bark 3D Embossing Folder for one card, and Timeworn 3D Embossing Folder for the other and then glued that down to the card base. Next, I ran my painted image through the Cut and Emboss Machine using the Stitched So Sweetly Dies for one of the cards and then glued that die-cut piece to a slightly larger piece of plain Crumb Cake CS. For the other card, I just simply cut the painted image down, and then I rounded the corners with a retired punch that I had (you can also just use scissors for this). For an extra bit of depth, I used my Blending Brushes with my Soft Suede ink and then gently rubbed the edges of the image giving it a beautiful antiqued and weathered look. I then used Stampin’ Dimensionals to affix the painted images to the embossed cardstock. Finally, I added my sentiments and some bling, and a beautiful creation was born!
Feel free to look at other Creative Inspirations and start creating!
Thank you for looking and happy stamping!!
***NOTE: Unless otherwise specified in my instructions, I typically don’t measure things precisely and usually just eyeball measurements and/or use scraps that I have on hand. I do, however, always use the standard 5-1/2” x 4-1/4” card base. If something needs a specific size, I will absolutely indicate that in my directions.

Be sure to follow me on Instagram, Facebook & Pinterest for updates and
the latest with The Stamping Cafe’!